
Tuning Retraction in 3D Printing: A Practical Guide for Cleaner Prints
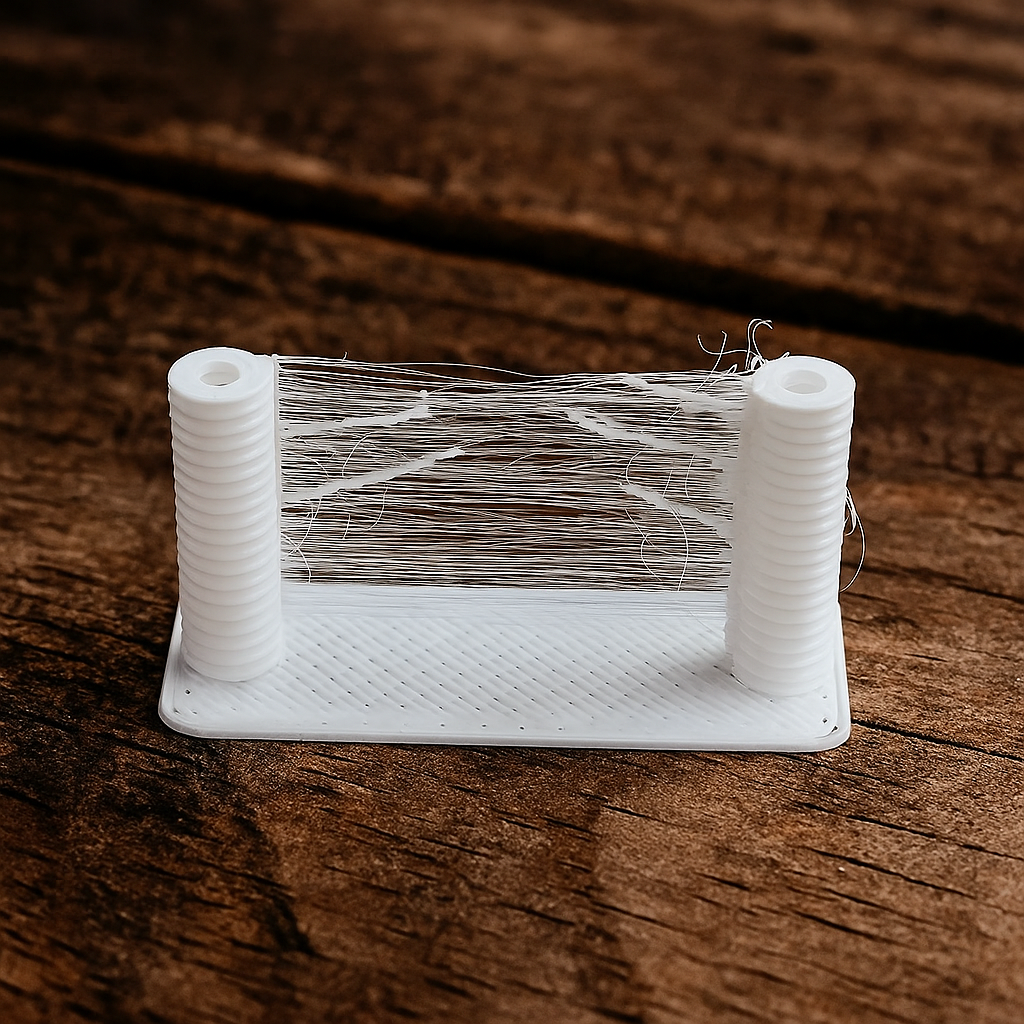
If you’ve ever found fine strands of filament between parts of your print, or noticed blobs and gaps in places you didn’t expect, chances are retraction is the culprit. Understanding and dialing in your retraction settings is one of the simplest ways to improve your print quality—especially when you start working with new filaments or faster print speeds.
At MakerParts 3D, we believe that every upgrade and tweak should deliver clear, real-world results. So here’s our straightforward guide to 3D printing retraction—what it is, how it works, and how to tune it like a pro.
What Is Retraction?
Retraction is when your printer’s extruder pulls filament back during travel moves (when it's not actively printing). The goal? Prevent oozing and stringing by relieving pressure in the nozzle.
Without retraction, melted filament continues to ooze during travel, leaving behind thin strings—like hot glue. Proper retraction settings stop that before it starts.
Core Retraction Settings
Let’s break it down into three settings you can actually tweak in your slicer:
1. Retraction Distance
This defines how far the filament is pulled back. The ideal distance depends on your setup:
- Direct Drive Extruder (like on most current Creality printers): 0.5–2.0 mm
- Bowden Setup (longer filament path): 4–7 mm, sometimes more
Start small and adjust in 0.5 mm steps. Too little = stringing. Too much = risk of clogs or grinding.
2. Retraction Speed
How fast the extruder retracts the filament. Typical values are 30–60 mm/s. Faster speeds reduce stringing but can grind filament if too aggressive. Slow it down if you notice clicking or grinding.
3. Flow Rate
Not technically retraction, but closely related. If your flow rate is too high, you may still get blobs or oozing despite decent retraction. Keep it at 100% to start and fine-tune from there.
How to Dial It In
Start with the default values from your slicer. Then:
- Print a retraction test model (many are free online).
- Adjust retraction distance or speed slightly.
- Re-test and compare results.
We recommend changing only one variable at a time so you can clearly see what’s working.
Creality-Recommended Starting Points (Direct Drive)
- PLA / Silk PLA: 0.5 mm @ 40 mm/s
- TPU: 2 mm @ 40 mm/s (slow speeds and minimal retraction work best)
- PETG / ABS: 0.5–1 mm @ 40 mm/s
Bambu Lab Starting Points (P1/X1/A1 Series)
- PLA / Hyper PLA: 0.8 mm @ 45 mm/s
- TPU: 1.2–1.5 mm @ 30 mm/s
- PETG / ABS / ASA: 1.0 mm @ 40 mm/s
Note: Bambu Lab slicer profiles often handle retraction well by default. Only fine-tune if stringing or blobs appear.
FlashForge Recommended Settings (Adventurer 5M / Pro)
- PLA / PLA Pro: 1.0 mm @ 40 mm/s
- PETG: 1.0–1.2 mm @ 35–40 mm/s
- TPU: 1.5–2.0 mm @ 25–30 mm/s
FlashPrint’s defaults are generally conservative. TPU especially benefits from lower speeds and shorter moves.
Avoiding Common Pitfalls
- Heat Creep: With too much retraction or poor cooling, filament softens too early and clogs the cold end. If this happens, reduce retraction distance or improve cooling.
- Stringing despite retraction: Try drying your filament. PLA and PETG absorb moisture quickly and become stringy.
- Under-extrusion after retraction: May indicate filament grinding or a jammed hotend.
Bonus Tips
- Store filament in a dry box to avoid moisture-related issues.
- Run retraction tuning when changing filaments, nozzles, or slicers.
- Use hardened nozzles for abrasive filaments to prevent wear-related oozing.
Final Thoughts
Retraction can feel a bit technical at first—but it’s one of the most rewarding slicer settings to master. Cleaner prints, fewer clogs, and a more polished final product are well within reach.
At MakerParts 3D, we stock only gear we trust—from nozzles and extruders to filament that plays nicely with your machine. If you need help choosing the right upgrade for your printer, we’re here.