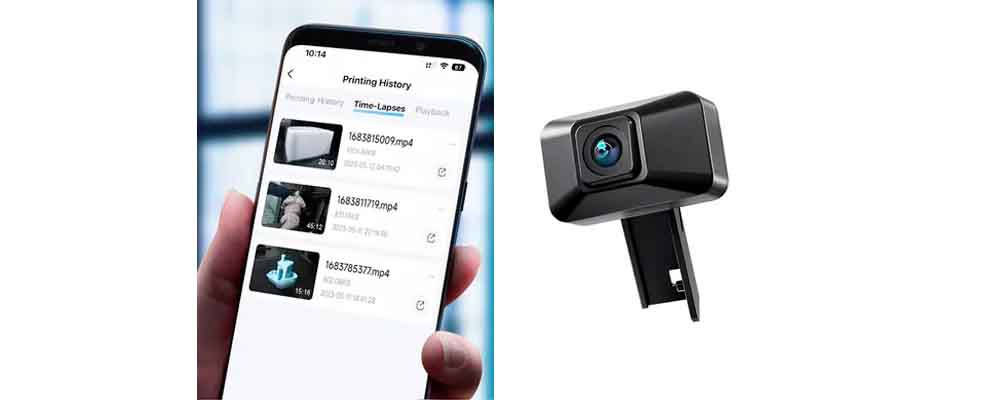
How to Set Up and Configure a Camera to Monitor Your 3D Prints: Step-by-Step Guide and Tips
3D printing is a fascinating process, but it’s not without its challenges. Print failures can be frustrating, time-consuming, and costly. Monitoring your 3D prints with a camera is one of the most effective ways to catch issues early, ensuring successful results while saving time and materials. This guide will walk you through everything you need to know to set up and configure a camera for monitoring your 3D prints, with actionable tips for optimizing your setup and leveraging remote monitoring.
Why Monitor Your 3D Prints?
3D printing involves long and often complex processes that require precision. Monitoring can:
- Minimize Print Failures: Catch issues like layer shifting, stringing, or nozzle clogs before they ruin the entire print.
- Save Time and Material: Detecting a failure early prevents wasting filament and printing hours.
- Enable Remote Supervision: Keep an eye on your print jobs even when you’re not near the printer.
- Increase Safety: Detect potential hazards like overheating or fire risks.
With these benefits in mind, let’s dive into the setup process.
Step 1: Choosing the Right Camera
When selecting a camera, consider these factors:
1. Type of Camera
- Webcams: Affordable and easy to use. Examples: Logitech C920, C270.
- Raspberry Pi Cameras: Ideal for DIY enthusiasts who use OctoPrint.
- IP Cameras: Perfect for remote monitoring over Wi-Fi.
2. Resolution and Frame Rate
- Opt for at least 1080p resolution for clear visuals.
- A frame rate of 30 FPS is sufficient for monitoring.
3. Field of View (FOV)
- Choose a camera with a wide-angle lens (≥70°) to capture the entire print bed.
4. Connectivity
- Wired cameras (USB) for reliability.
- Wireless cameras (Wi-Fi) for flexibility.
Pro Tip:
If your printer is in a low-light area, consider a camera with night vision or add external lighting.
Step 2: Setting Up the Camera
Once you’ve chosen your camera, it’s time to set it up.
1. Positioning the Camera
- Mount the camera so it has a clear, unobstructed view of the print bed.
- Place it at an angle that shows both the nozzle and the printed object.
- Avoid extreme close-ups; a broader view allows you to monitor the entire print.
2. Mounting Options
- Tripod: Simple and adjustable.
- 3D-Printed Mounts: Customizable mounts designed for your printer model.
- Adhesive Mounts: Easy to install but less flexible.
Pro Tip:
Use a flexible gooseneck mount for precise positioning.
3. Connecting the Camera
- USB Cameras: Plug into your computer or printer’s controller (e.g., OctoPrint).
- IP Cameras: Connect to your Wi-Fi network and use an app or browser to access the feed.
- Raspberry Pi Camera: Attach it to the Pi and integrate with software like OctoPrint.
Step 3: Configuring the Monitoring Software
To view and manage your camera feed, you’ll need compatible software. Here are the most popular options:
1. OctoPrint (For Raspberry Pi Users)
- Install the OctoPrint Webcam Plugin to integrate your camera feed.
- Set up a Raspberry Pi with OctoPrint and configure the camera using the built-in settings.
- Access the live feed via a web browser or mobile app.
2. IP Camera Apps
- Use apps like TinyCam Monitor or IP Cam Viewer for Android/iOS.
- Set up the IP camera’s URL in the app for remote viewing.
3. Desktop Software
- Tools like OBS Studio or VLC Media Player allow you to view and record the camera feed.
Pro Tip:
For advanced features like time-lapse videos or motion detection, consider adding plugins like Octolapse (for OctoPrint users).
Step 4: Enhancing Remote Monitoring
1. Using Cloud Services
- Services like The Spaghetti Detective (now Obico) provide AI-based monitoring to detect print failures automatically.
- Integrate with OctoPrint for remote alerts and live video streaming.
2. Mobile Apps
- Many IP camera apps support push notifications for motion or anomalies.
- Combine with cloud storage to save snapshots of print progress.
3. Network Configuration
- Set up port forwarding on your router to access the camera feed remotely.
- Use a VPN for secure access to your local network.
Pro Tip:
To avoid bandwidth issues, reduce the camera’s resolution or frame rate for remote monitoring.
Step 5: Practical Tips and Tricks
1. Improve Print Visibility
- Use LED lighting to illuminate the print bed for better video quality.
- Add a light diffuser to prevent harsh reflections.
2. Prevent Vibrations
- Mount the camera on a separate surface to avoid vibrations caused by the printer.
3. Keep the Lens Clean
- Dust and filament particles can accumulate on the camera lens. Clean it regularly with a microfiber cloth.
4. Secure Your Setup
- Ensure all cables are neatly organized to prevent interference with the printer.
5. Test Before Long Prints
- Verify the camera’s angle and focus before starting long print jobs.
Troubleshooting Common Issues on 3D Printer Cameras
1. Blurry Video Feed
- Adjust the focus manually (for cameras with adjustable lenses).
- Ensure the camera is mounted steadily and securely.
2. Connection Problems
- Restart your router and camera.
- Ensure the camera’s firmware is up to date.
3. Laggy or Low-Quality Feed
- Reduce the resolution or frame rate in the camera settings.
- Check your network’s bandwidth and reduce congestion.
Conclusion
Monitoring your 3D prints with a camera is a game-changer for any maker. With the right setup, you can catch issues early, save time, and ensure safer printing. Whether you’re a beginner looking for a straightforward setup or an experienced maker aiming for advanced remote monitoring, the steps and tips outlined in this guide will help you achieve your goals.
Start setting up your camera today and experience the peace of mind that comes with knowing your 3D prints are always under watchful eyes!